Altula
Welcome to Altula UK
- Contact Us
- Contact Us
- 877-908-2113 (Canada)
- +44 (0) 2036 080 627 (UK)
- Sales
- Languages
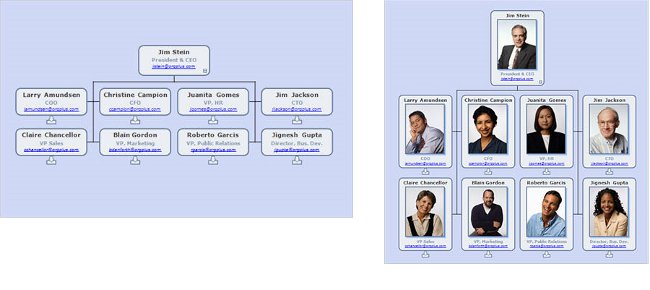
This article describes how to place pictures in organizational chart boxes using the Photo Manager. Pictures added using Photo Manager can be synchronized with the original data source.
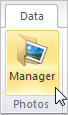
With your chart open, click the Data tab and select Manager from the Photo section.
If the chart has no Pictures fields defined, the following Photo Manager message is displayed.
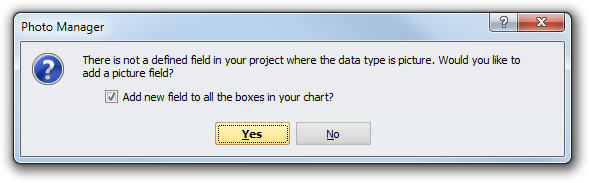
Select Add Field to all the boxes in your chart if you want to add new Pictures fields to all the boxes in your chart, and click Yes to continue. Click No to cancel the action.
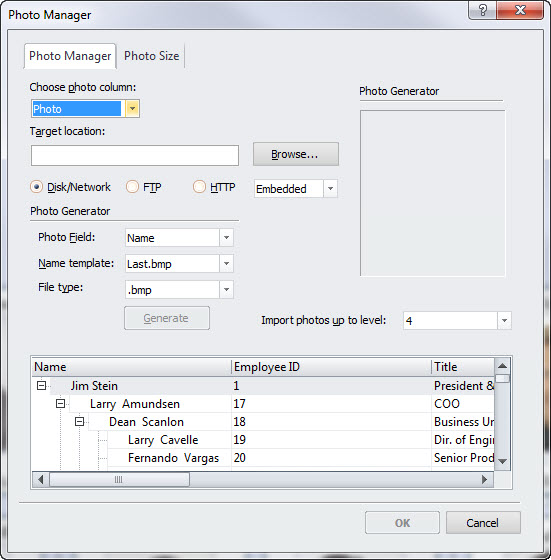
The Photo Manager dialog box opens.
Define your settings as follows:
Note: You can specify whether to embed or link picture files to your chart. Linked files result in a smaller file size; however, if you share your OrgPlus file with other users they may not have access to the linked picture files.
Name template: Select how the picture file name should be constructed. For example: if a field has the name Adam Smith, selecting:
Click Generate to match boxes in the chart with picture files from the source. The results of this are shown in the table at the bottom of the dialog box.
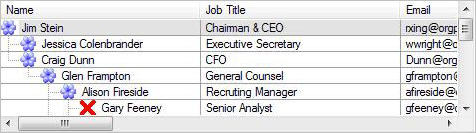
The  symbol indicates that a match was found. The
  symbol indicates a missing photo.
Note: You can view a preview of the picture that corresponds to a row by selecting that row in the table.
Click the Photo Size tab if you want to change the default scale, size and alignment before importing each picture.
Note: Importing large photos into your chart can affect performance. We recommend that you create smaller versions of photos before importing.